Saturday, February 4, 2012

Valentines Day!

I can't express how happy I am that V-day is upon us! I usually don't buy into the commercialism of it all but with my eldest in pre-school and showing a big interest in giving out valentines I found myself googling and Pinteresting and becoming hooked! I didn't want to give anything sugary so I went to creative route ;)

I found these beautiful crafts and of course we did our own versions of them ;)

We did some of these Handprint Valentines - Honestly they look really cute but for kids that are just learning to write it was a bit of a chore... lol
Next we tried these cute crayons out! Heart Crayon We emptied our crayon bucket and took all the odd end ones, we also raided my in-laws crayon bucket and stole their broken ones too. The kids LOVED them. A word of advice, use a razor. Cut one line down the paper jacket, let the kids peel and break the crayons. This whole process takes like a minute or two. If you do it 'the old fashion way', you'll be peeling for five minutes and having children whining about how long it's taking and a lot of 'Are you done yet?'.
Darling Daughter can't sign her name yet so she signed her valentines with two thumb prints to make a heart.
Valentines 'Package'

A small v-day card, some goldfish, a crayon heart and some stickers :)
This is our handprint hearts before writing around the hearts. With the writing you can't tell what they are saying and the words go all over the page... lol
An that's what we've been up to for V-day! ;)

Monday, January 30, 2012

Reversible Apron Tutorial.

So I had to make two special little girls Aprons to help me bake in the kitchen. They are both pretty baking obsessed so I figured they'd enjoy their own little Apron and Oven Mitt.
I liked two different Tutorials Mini Me Apron Set and Childs Apron, but ultimately took pieces from both, combined them, and made my own. ;)
The Mini Me Apron Set tutorial is 100% free. No fee at all but a lot of work due to the bias tape...
The Childs Apron is not free... You have to pay some sort of membership fee to download the pattern but if you can make your own pattern the Tutorial aspect of the page is just fine. It's a VERY simple pattern/apron.
And below is MY version ;)
I used the Mini Me Apron Set pattern to start off with.

 What you need
1/2 yard of Side A
1/2 yard of side B
2 yards of ribbon
1/4 yard of towel material
Other basic sewing accessories

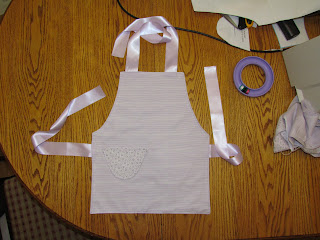
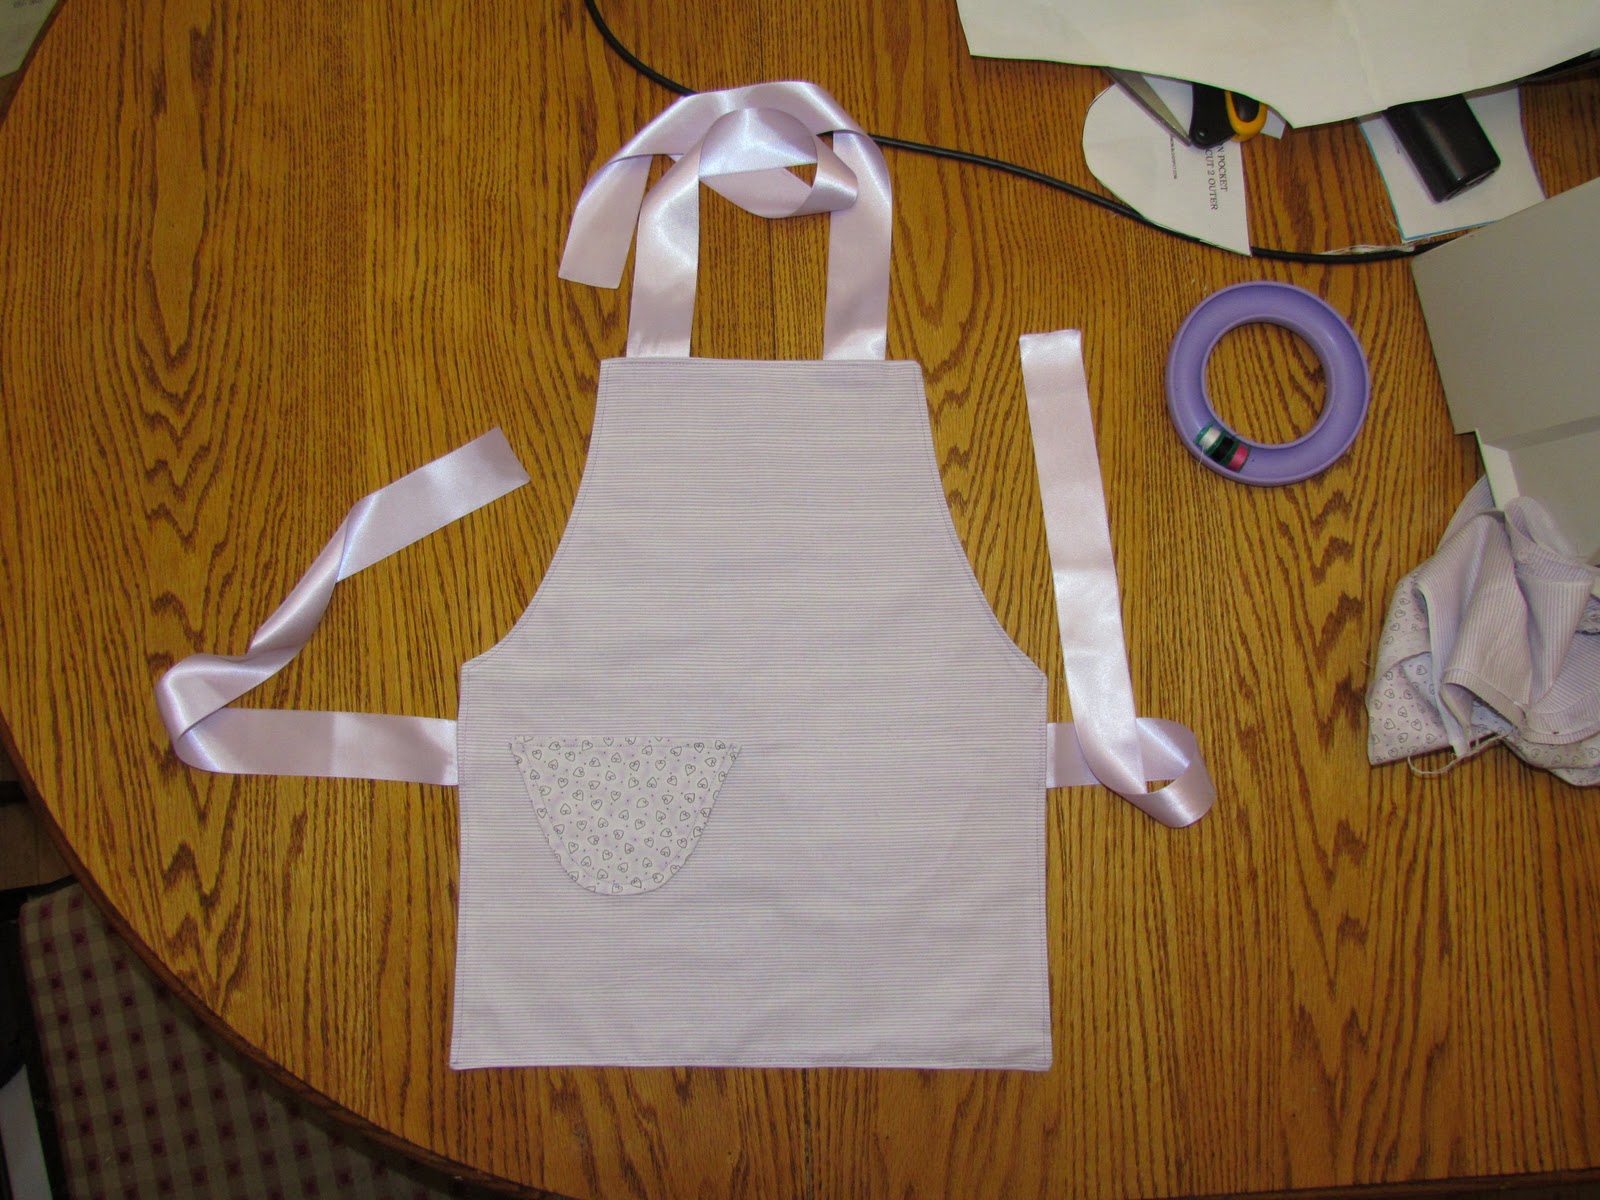
Side A

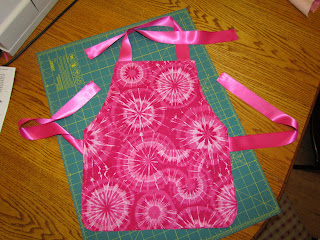
Side B

Pockets A and B
 Place one A and one B right sides together and sew together leaving an 1.5'' opening at the top of the two pieces. Use a 1/4'' seam allowance at the top but for the curve you can switch to 1/8''.
Turn the pieces right side out and iron the opening to fold inward like the picture above.

Sew to top closed. Then pin one pocket with reserve side out. You'll see in the picture above I put the Pocket B side up and the Pocket A side inwards to match and Apron A piece. Sew the pocket in place following the curve using a 1/8'' seam allowance, increase to 1/4'' if desired. Repeat on Apron B piece with Pocket A side up.
Next comes the 'ties' I heat sealed my ribbon ends to prevent fraying. I then pinned the ribbon on to the wrong side of the apron. You'll see above that I places the ribbon 1.5'' from the arm curve. 
 I used a few 'tacking stitches' about 1/8'' away from the aprons edge. I did this to all four pieces of ribbon. Two for the sides and two for the neck. The neck ribbons were place roughly 1'' from the sides.
 You then tuck everything in and pin it Sides A and B together with right sides facing in and wrong sides facing out. Sew leaving an 1/4 seam allowance. Make sure that your ribbon is straight when you sew over it. It can become crocked if not checked.
Side A finished
Side B finished

Side A finished
Side B finished 


 Cut the mittens out. Place the right sides together like the picture above and sew leaving a 1/4'' allowance.
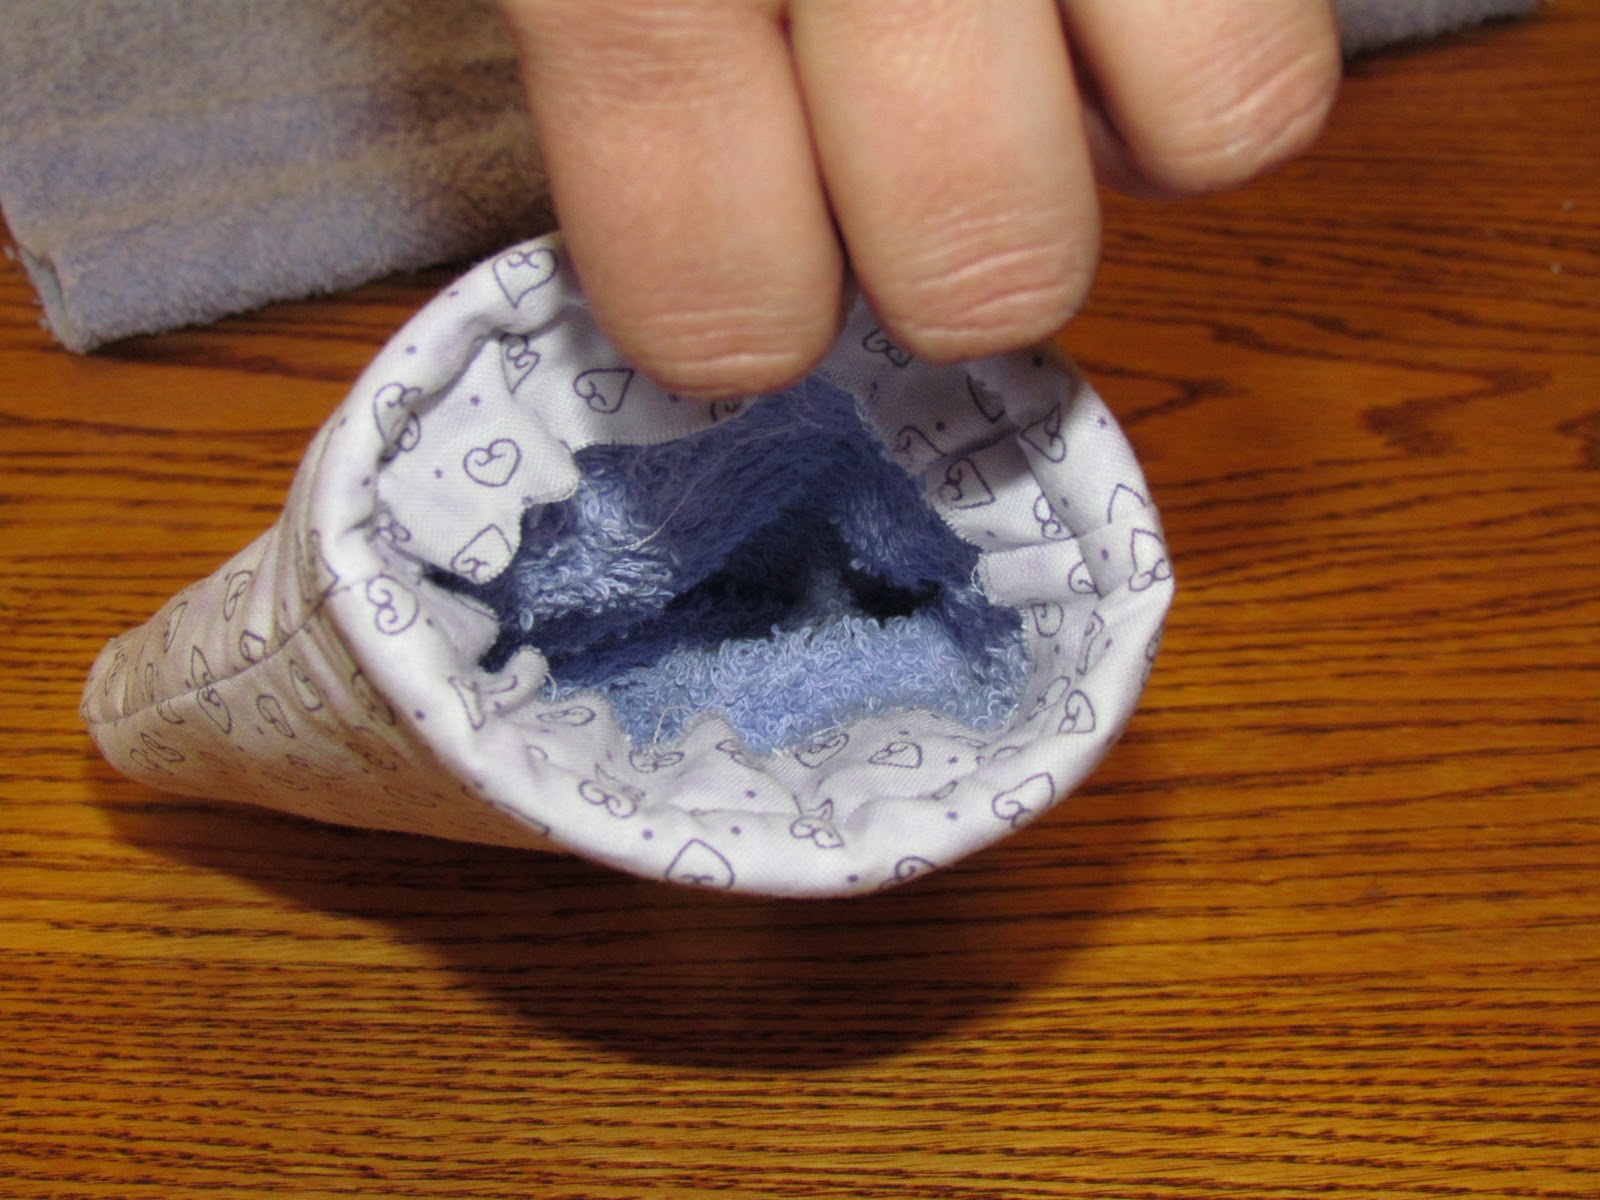
Clip around the curved part of the mitten and the fingers. Turn the mitten right side out. Stick the towel mitten inside the outer shell. Fold the rough edges inwards twice... then iron. I only folded ONCE... As you'll see in the picture below it leaves an unsightly mess to do it my way so I suggest folding twice. Sew using an 1/4'' to 1/2'' seam allowance depending on how much you folded inwards.
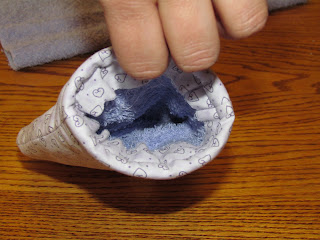
Inside few of mitten.
And that's my version of a Reversible Apron Tutorial + Oven Mit. :)

Friday, January 20, 2012

Baby Doll Diapers

Wow the 20th already!? OMGosh! I can't believe it's been so long since I updated last! Oh well I've been busy on Pinterest ;) The Gossamer Goddess Pinterest.
Well today I've been busy (Kinda) working on four projects.
I made Felt Baby Doll Diapers.
I followed this tutorial to the letter! It's SUPER easy and great for sewers, or non-sewers of all ages. If you can trace, cut and glue you can do this one!
Here's some pictures of my own version of the project!


And that's it! That's what I've been up to today... Among other things ;) But they aren't ready to post up yet! :) I'll get them up sometime in the future! ;) Promise! Till then keep it crafty!

Friday, January 6, 2012

Cute Reusable Bag!

Alright so I went hunting through reusable bag tutorials for the past few days. I wanted to make a multi-purpose bag. Nothing too big, you know 'I need to pick up a few small items' kind of bag but that could double up as a small purse if needed. So it HAD to be cute and functional. It sounds easy enough to find something like that but I'm picky so it took me a few nights ;)
Finally I found this: Little Bird Book Bag. It's SUPER cute and I fell in love with it right away!
I'm going to do my own walk through of this tutorial since I changed a few minor things with my own purse that you may want to do too. I love experimenting and trying new things and found I actually preferred my way - it was easier for me. Just remember that my changes were what was best for ME and MY skill level. If you're more comfortable you should try your own way, or if you rather do it to the original than do so. Always work with within your comfort zone or else projects that should be fun can turn into nightmare like chores :(

Anyways!

Now I followed the cutting of the sweater and the sewing of it exactly as the tutorial told me to.
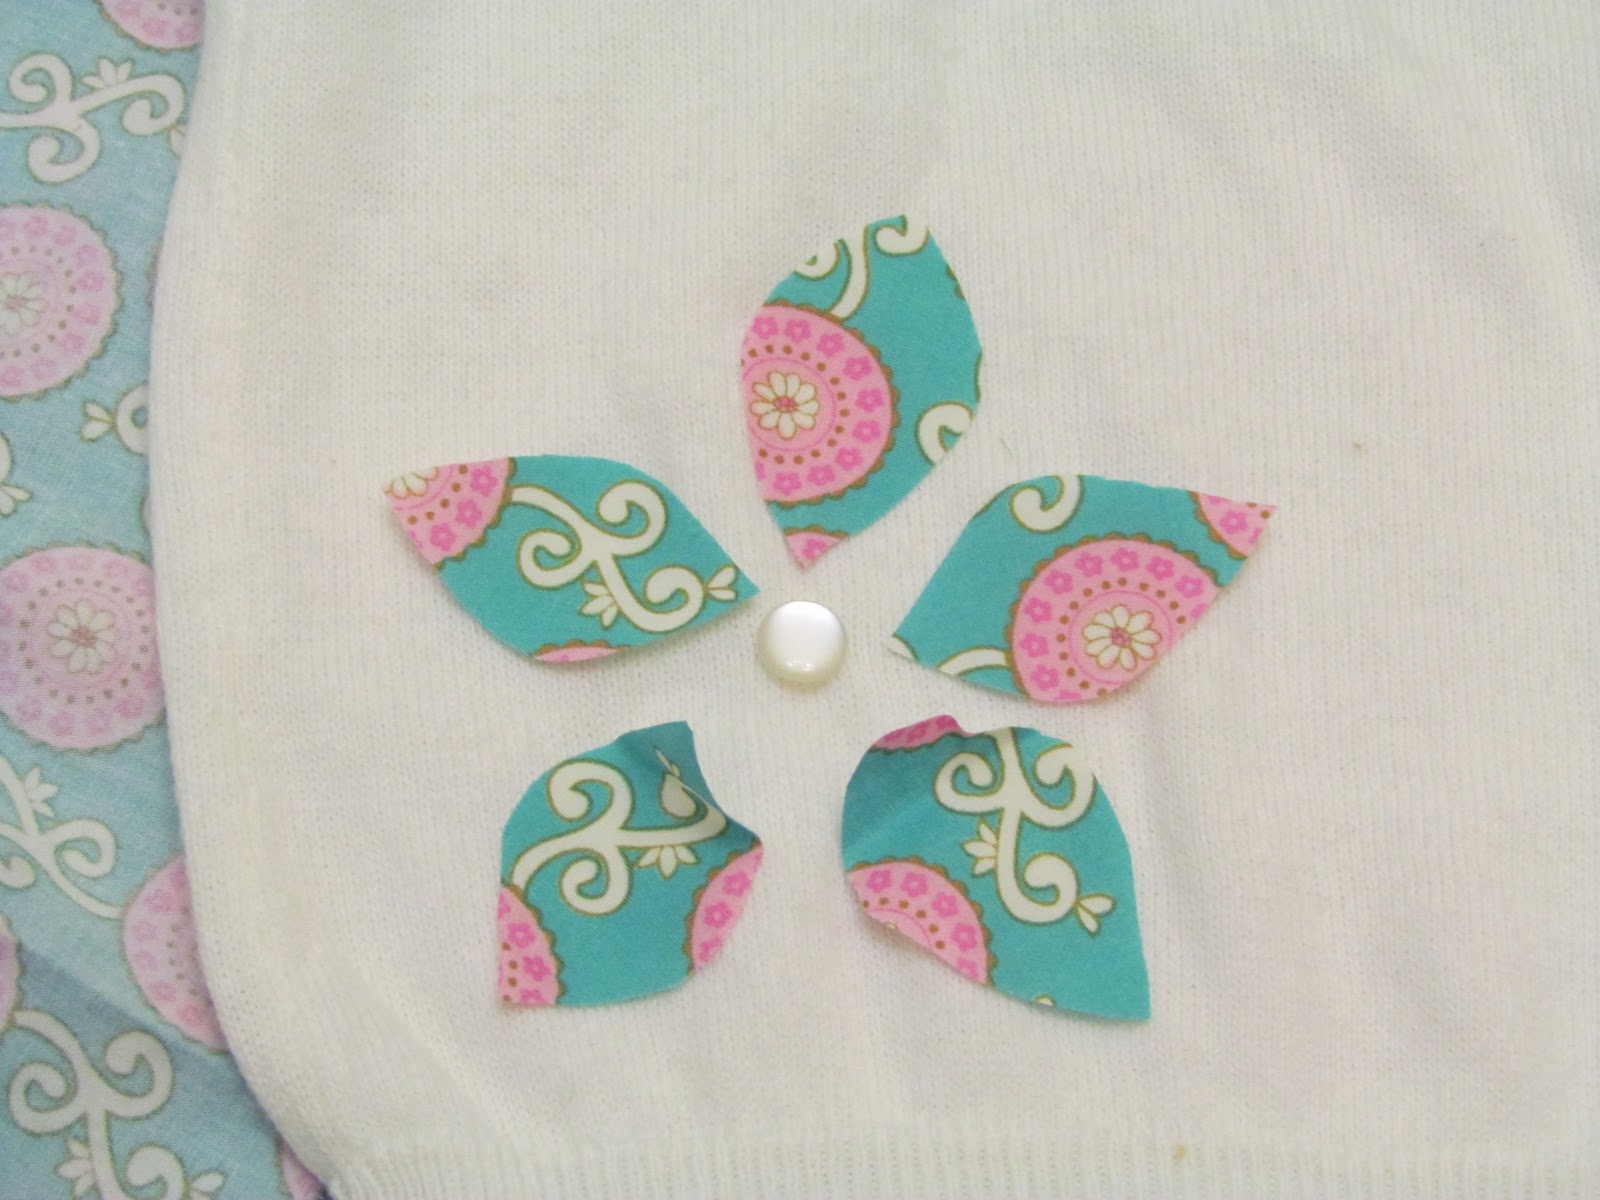
I then proceeded to change the bird to a flower. I also used my machine to sew on the flower... I wanted it to be secure and find my hand sewing lacks when it comes to loose knits.
I added a button from the sweaters top
This is what it looked like after the flower was sewn on
The next couple of photos are just me lining up the fabrics and then sewing them. DO NOT SKIP THE IRONING!!! I will admit I'm bad and sometimes skip the ironing on some projects... This is not one of them!

 So being super awesome I managed to be short on material ;) I had two choices. Make a short handle...
 Or sew a few pieces together and make a longer one.
 I decided I liked the longer one. I four cut 2'' by 7'' pieces in the fabric I had left. I then sewed the pieces together, I didn't worry about lining up the fabric or anything. I thought it looked cuter being a little miss matched. I then ironed down the seams (pic below)
 I then sewed the piece of fabric closed with a 1/4'' allowance. I ironed 1/2'' on both sides upwards. So the good side was showing 1/2'' against the rough side. I then turned the piece of fabric right side out making sure to keep the 1/2'' ends in place so they didn't pop back out.
 I sewed all along the sides with a 1/4'' seam allowance. I then attached it to the purse in the same fashion that the tutorial used.
Close up of the strap
And wa-la! We're done! That's what the bag looks like 100% done! I took this picture with the other strap pinned down still (silly me) I can upload some pictures of the inside of the purse later. :)

Sunday, January 1, 2012

Crafty Christmas

I can't believe it's here already! I thought for sure I had a few more days of 2011... Oh well 2012 is my year to be my craftiest ever! I promise ;)

So I guess I'll do a run down of everything I made for Christmas and share inks to everything that I made... ;)

I made my little ones Rag quilts. Now for those I didn't really do much in the way of 'research' I was just told how to do it and then I proceeded to well, do it ;)

Basically I took 16 squares that were 18'' by 10'' and made them into a rectangle by doing four by four. I then added a boarder around it with two long pieces that were 72'' by 8'' - folded in half to make 72'' by 4'', and one that was 40'' by 5'' for the 'ends'. Sewed them all together, clipped them and wa-la. I had two rag quilts made with love. ;)

I'll post pictures up when I can tackle the darn things down long enough for hold still. The quilts are a big hit right now and are taken EVERYWHERE around the house.

I also made this: Turn a Wipe Container Into A Toy My youngest is in love with this. It's a lot of fun for her to toss the 'wipes' around without being scolded. It also is really easy to clean up. Which is a huge plus for me.

Admittedly I had a horrible time with this next project... Fabric Doll House. I'm not sure if I was just tired of crafting or what was going on but this project felt like it went on forever. It turned out to be pretty cute for my daughters Calico Critters but I'm making another version of the Doll House because I wasn't completely satisfied with the way it came out.

I made some more of these too: Repurpose a Sweater These were loved by all! They are just so cute and for what you pay for a sweater dress brand new are totally worth it. It is a super simple project and I encourage EVERYONE to try it!

Now for you bakers I also made up nine dozen of these wonderful cookies! Chewy Chocolate Chip This recipe is GREAT but I suggest always making more than size dozen. I have no idea why - I'm sure somewhere with better baking experience can tell you... But for some reason larger batches just turn out better. Also I suggest putting the cookie dough in the fridge for 30-60 minutes to make it easier to work with. Also check it FREQUENTLY. It's a fine line between brown and burnt. These cookies are better the next morning/day too.

Well I'm pretty sure that's everything I made for Christmas but I'm sure I'm missing something somewhere ;) Till later!

Friday, December 16, 2011

Mermaids!

Well I decided to use my 'new to me' sewing machine and see what I could do with the ancient beast. Now my machine is 20 some years old so really all it does is go straight, back, and a very touchy zig-zag stitch. It took me HOURS to figure out how to get the darn thing to thread properly and even now it's hit or miss. It's a very particular thing... But I refuse to accept defeat ;)

Anyways, since Christmas was coming up I decided I'd make my girls some dolls. After a Google search I found the most adorable little Mermaids! - You can find a link to this pattern in my tutorial page.

So I can up a tester of these little darlings.
Tester Mermaid - Made from old Receiving Blankets
I LOVED her so very much! I was very sad when my parents-in-laws dog ate her :( He took an arm and all of her hair clean off... Was very traumatic.

Anyways after I got a feel for how this doll was made I made some very minor adjustments. I made her arms longer, just a little bit... I also added stuffing inside the tails walls.

Next came the 'Next generation' lol

Mermaid 2nd Generation - Yarn hair
So I got pretty good reviews about this one. I decided I liked the look of it but for playing the yarn hair would be a lot less practical, so I switched back to fabric hair for the third generation. ;)

Mermaids 3rd Generation

Mermaids 3rd Generation - Finished Purple Feather Hair
Now some of you may think that the purple crazy hair is a bit extreme, but I knew the little one I was making it for would love it. I was getting kind of sick of ladder stitching too and it was a midnight. 'Gah I just need this DONE!!!' moment... I'm sure we all have those ;) I can't be the only one right!? :P

So I looked in my craft cupboard and found a purple boa. I played with it a little and then carefully, and I mean CAREFULLY glued the hair to the mermaids head.

Complete Collection of 3rd Generation

3rd Generation Yarn Haired Mermaid

3rd Generation Blue Mermaid Close Up
So that's the complete 3rd generation of Mermaids... But I wasn't done there... Oh no! I'd bought enough material to make an army of mermaids and I wasn't going to just stop at six!

4th Generation

Close Up of 4th Generation - Red

Complete 4th Generation Set
For the 4th generation I didn't do anything too crazy. I did add a fray flower with a 'diamond' and beads sewn around it to give the pink mermaid 'bling'. I love how much it turned out if I have time I may have to make some as hair clips! We'll see ;) It was meant for a very girly girl who loves pink so I thought it was fitting. ;)

That ends my mermaid adventures for now. I do have to remake a tester mermaid as I gave it to my youngest since it was the most expendable. I think I have some girls birthdays in march too...

Well I'll leave it there for today! Make sure to check back later in the week to see what else I'm making for Christmas! ;)

Monday, December 12, 2011

Dino Day Five - Pteranodon

Wow... Been awhile since I updated! I haven't been able to pull away from my sewing machine... I apologize!

Anyways onto day five!

Honestly it's been a while since day five but I knew that we choose a Pteranodon because of Dinosaur Train. My darling daughter, LOVES Dinosaur Train, and it's one of the few shows I can sit down and enjoy with her ;) Always a big bonus in my house.

Dino Mural - Day Five

For our pteranodon all we did was watercolors on some card stock with googly eyes! Pretty simple... My little one was so proud of herself when this was all done! She did an amazing job and learned a lot about dinosaurs. 

Even now it's hanging up in my dinning room wall, and she can remember every dinosaurs name, and what kind of food they eat. Pretty good for a random week project ;) I was very happy with the end results!

I think my next few posts will be about the insanity that is all my Christmas projects :P 

Till then... Keep it Crafty ;)